index_182
Router Security Configuration Guide
UNCLASSIFIED
182
UNCLASSIFIED
Version 1.0g
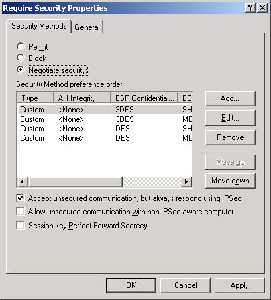
Click on the security method preference order options and edit them to ensure that at
least one of them contains the cryptographic settings for protecting the actual data
that was configured in the Cisco. In fact, if you want to delete all but the one offer
that is used, that would not be bad. For our example, we are using ESP with both
3DES and SHA, and are not using the AH protocol. The lifetime (until keys are
renegotiated) is not important, so any settings for that are acceptable. We want to
select “Negotiate security” here.
Choose “Accept unsecured communication, but always respond using IPSec”. We do
not want to select the final two options, “Allow unsecured communications with non
IPSec aware computer” and “Session key Perfect Forward Secrecy”. The reason we
don't want to allow unsecured communications is that this IPSec configuration only
applies to communication with the router, communication to other places is not
affected and so not IPSec protected. For just this connection, we want to use
security, so we require it. Perfect Forward Secrecy is a way to do a second key
exchange, which is mostly used when the initial key exchange is shared. This is not
the case here. When all these settings are correct, click “OK”. Highlight the
“Require Security” button, and click “Next”. The only remaining thing to do is to
click "Finish." The next time you connect to the Cisco router, IPSec will be activated
automatically, and the traffic will be IPSec protected.
After following all these steps, you have created an IP Security Policy, and that new
policy will appear in the management console window. Make sure that the policy is
actually in effect, typically you must explicitly assign a policy after creating it. Look
at the third column, “Assigned”, of the policy listing in the management console
window. If the column contains the word “No”, then right-click on it, and select
“assign” from the popup menu. The value in the third column should change to
“Yes” and the policy will be imposed.


