
|
|
| Previous | Table of Contents | Next |
The proximity settings deserve comment. SATAN treats any host information gained from a scan of a single target system as having a proximity of 1 to the target system. This means that the name servers, MX mail hosts that receive mail for this system, NFS clients, and hosts listed in the .rhosts/hosts.equiv files are all considered to have a proximity of 1 to the target. If you scan with a maximal proximity setting of 2, the number of hosts scanned can become quite large. SATAN scans the target, then scans all hosts that have a proximity of 1 to the target, and then scans all hosts that have a proximity of 1 to the hosts that have a proximity of 1 to the target. You can imagine the exponential growth involved with SATAN scans that use a maximal proximity setting greater than 2. When the maximal proximity field is set to 0, SATAN scans only the target system, and possibly the target’s subnet.
The proximity descent field can be used to decrease the intensity of the scan as SATAN moves the scan out to less proximate hosts. For example, consider a situation where the maximal proximity field is set to 2, the proximity descent field is set to 1, and the probe level starts at heavy. The target is scanned at the heavy level, the hosts at proximity of 1 are scanned at the normal level, and the hosts at proximity of 2 are scanned at the light level.
If you specify a subnet expansion, SATAN scans every host with an IP address whose first three parts match the target. For example, if the target was 192.12.13.14, SATAN would scan every host in the IP range 192.12.13.1 to 192.12.13.254. (Note that x.x.x.0 and x.x.x.255 are typically reserved for broadcast and are not assigned to individual hosts.)
Documentation
Selecting the SATAN Documentation option from the SATAN Control Panel brings up an index into SATAN’s extensive online documentation, as shown in figure 8.10. Detailed information on SATAN and network vulnerabilities is available.

Figure 8.10 The SATAN Documentation index.
The following are the three most useful parts of the documentation:
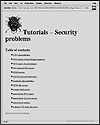
The SATAN Reference provides detailed information about SATAN, the database records, and the inference engine. SATAN includes tutorials on the 13 network vulnerabilities included in its scans. If you choose the “Vulnerabilities - a Tutorial” option from the SATAN Documentation screen, SATAN brings up the list of these tutorials, as shown in figure 8.11.

Figure 8.11 The SATAN Tutorials-Security problems
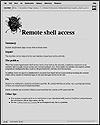
Choosing an entry from the Vulnerabilities screen brings up a tutorial that includes tips on addressing the problem and web links to programs and information regarding the problem. For example, if you choose the Remote Shell Access option from the Vulnerabilities screen, SATAN brings up the Remote Shell Access screen shown in figure 8.12.

Figure 8.12 The Remote shell access tutorial.
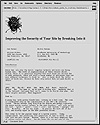
Note that many of the tutorial screens, such as the one shown in figure 8.12, provide a link to the seminal paper Improving the Security of Your Site by Breaking Into It (Farmer & Venema, 1993). This influential document was written by the authors of SATAN and led to the creation of SATAN. The entire goal of SATAN was to automate the process described in the paper. If you select the Admin Guide to Cracking option from the Remote Shell Access screen, SATAN brings up the paper, as shown in figure 8.13.

Figure 8.13 SATAN’s Admin Guide to Cracking.
Follow these steps to run a scan:
You have now completed the SATAN scan. If you are running a scan against a subnet, you have a maximal proximity setting greater than 1, or you have scanned several hosts, your database information might grow large. To generate reports that help you sort this data, choose the SATAN Reporting & Data Analysis option from the SATAN Control Panel. From the SATAN Reporting and Analysis screen, you can select reports that help to sort the information on all the database records.
There are three types of database records: facts, all-hosts, and todo. These database records are stored in three different files: facts, all-hosts, and todo. These files are typically in a subdirectory of satan called results/satan-data. The subdirectory of results corresponds to the name of the SATAN database, with the default being satan-data.
The facts file contains the results of vulnerability scans; each record of this file is called a fact. SATAN attempts to build a database of host information in the all-hosts file, which contains host name information, regardless of whether SATAN scanned those hosts. The todo file keeps track of which probes have been run against a target.
Looking at the Facts
Each .satan script (program) is required to output text records that are directly stored into the facts database file. Each text record consists of eight fields, each separated by a pipe (|) character. Newlines separate entries in this file. Each SATAN fact starts with a $target field and ends with a $text field. The rulesets use PERL search capabilities to match against records from the facts file. SATAN rulesets are described in detail later in this chapter in a section called “Understanding the SATAN Rulesets.”
Each SATAN fact consist of the following eight fields:
Target ($target)
This is the name of the host that the record refers to. SATAN tries to put the fully qualified domain name into this field, but if it cannot, it uses the IP address. If that fails, it uses an estimated name or partial name.
| Previous | Table of Contents | Next |